简介:emqx-coap是EMQX的COAP网关,将COAP消息翻译成MQTT消息,在COAP客户端和MQTT客户端之间通讯。即使用coap发送的消息可以用coap收,也可以直接用Mqtt收,返回来亦可。
一、准备安装环境
yum -y install perl-devel.x86_64

yum -y install make gcc gcc-c++ kernel-devel m4 ncurses-devel openssl-devel
二、升级OpenSSL
不升级的话,后续安装会报错的。libcoap安装需要OpenSSL1.1以上。
报错如下:configure: error: ==> OpenSSL 1.0.2k too old. OpenSSL >= 1.1.0 required for suitable DTLS support build.//进入一个下载目录,下载并加压缩文件
cd /home
wget https://www.openssl.org/source/openssl-1.1.1.tar.gz
tar zxvf openssl-1.1.1.tar.gz
cd /home/openssl-1.1.1
//设置安装的路径
./config shared zlib --prefix=/usr/local/openssl --openssldir=/usr/local/openssl/ssl
//安装
make
make install安装完了之后我们查看openssl的版本
//进入安装的bin目录
cd /usr/local/openssl/bin

//设置库文件的配置
echo "/usr/local/openssl/lib" >> /etc/ld.so.conf.d/openssl-1.1.1.conf

//生效
ldconfig -v

//查看版本
openssl version -a
-------------------
OpenSSL 1.1.1  11 Sep 2018
最后建立软链接,关联新版本
//备份旧版本
mv /usr/bin/openssl /usr/bin/openssl.bak

//建立软连接新版本。
ln -s /usr/local/openssl/bin/openssl /usr/bin/openssl
三、安装libcoap
1 安装需要用的包
yum install autoconf automake libtool

yum -y install git
2 下载并安装libcoap
//下载
cd /home
git clone http://github.com/obgm/libcoap
cd libcoap

//生成configure
./autogen.sh

//安装配置
./configure -enable-documentation=no -enable-tests=no

-------------------------------
//升级OPENSSL还报错,因为没有配置环境变量,安装未生效
configure: error: ==> OpenSSL 1.0.2k too old. OpenSSL >= 1.1.0 required for suitable DTLS support build.
3 配置环境变量
//先查看自己的openssl的版本
pkg-config --modversion openssl
--------------------------------
1.0.2k

//配置PKG_CONFIG环境变量(PATH:后面跟的参考自己刚刚安装的路径)
export PKG_CONFIG_PATH=$PKG_CONFIG_PATH:/usr/local/openssl/lib/pkgconfig

//查看
pkg-config --modversion openssl
--------------------------------
1.1.1
这个环境变量可以配置进环境变量文件bash_profile,然后用source启用,否则,每次启动都需要
4 继续配置和安装
./configure -enable-documentation=no -enable-tests=nomake
make install四、加载插件
1 命令方式加载
在etc目录下新建文件:vi /etc/emqx_coap.conf
## The UDP port that CoAP is listening on.
##
## Value: Port
coap.port = 5683

## Interval for keepalive, specified in seconds.
##
## Value: Duration
##  -s: seconds
##  -m: minutes
##  -h: hours
coap.keepalive = 120s

## Whether to enable statistics for CoAP clients.
##
## Value: on | off
coap.enable_stats = off
如果需要单向SSL认证
## The DTLS port that CoAP is listening on.
##
## Value: Port
coap.dtls.port = 5684

## Private key file for DTLS
##
## Value: File
coap.dtls.keyfile = {{ platform_etc_dir }}/certs/key.pem

## Server certificate for DTLS.
##
## Value: File
coap.dtls.certfile = {{ platform_etc_dir }}/certs/cert.pem
双向SSL认证
## A server only does x509-path validation in mode verify_peer,
## as it then sends a certificate request to the client (this
## message is not sent if the verify option is verify_none).
## You can then also want to specify option fail_if_no_peer_cert.
## More information at: http://erlang.org/doc/man/ssl.html
##
## Value: verify_peer | verify_none
## coap.dtls.verify = verify_peer

## PEM-encoded CA certificates for DTLS
##
## Value: File
## coap.dtls.cacertfile = {{ platform_etc_dir }}/certs/cacert.pem

## Used together with {verify, verify_peer} by an SSL server. If set to true,
## the server fails if the client does not have a certificate to send, that is,
## sends an empty certificate.
##
## Value: true | false
## coap.dtls.fail_if_no_peer_cert = false
命令加载:/etc/目录下
/usr/bin/emqx_ctl plugins load emqx_coap2 dashboard方式加载
浏览器输入:ip:18083,进入插件页面,启用并配置插件

五、测试
1 coap-client方式
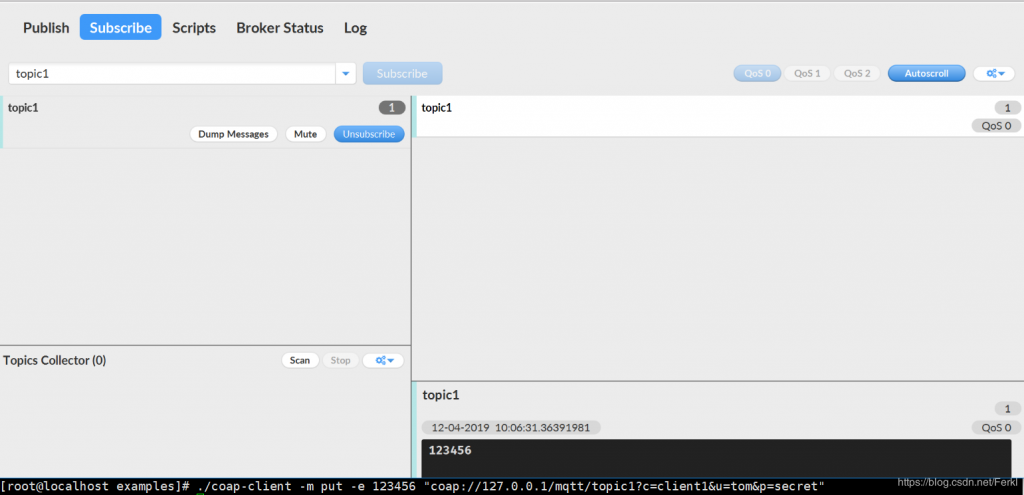
coap-client发送:
/home/libcoap/examples/coap-client -m put -e 1234 "coap://127.0.0.1/mqtt/topic1?c=client1&u=**&p=**"
主题:"topic1", 而不是"/topic1"
客户端ID:client1
用户名:tom
密码:secret
需要发送的字符串:"1234"
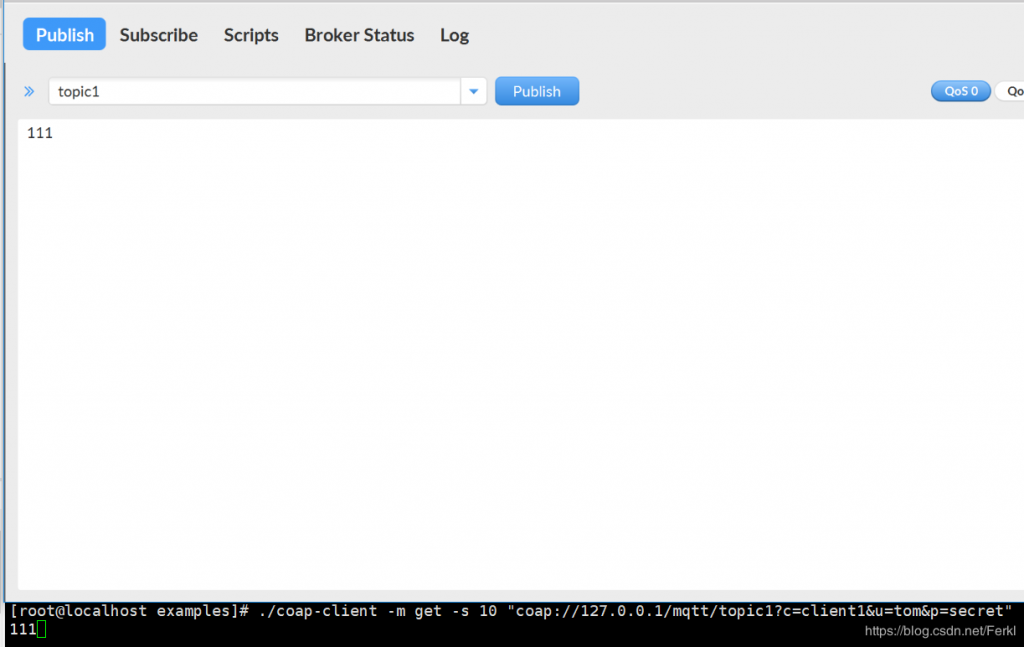
此时凡是订阅topic1的MQTT或者CoAP客户端都能收到发布的1234这条消息。coap-client接收:
[apache@ai_bk ~]$ /home/libcoap/examples/coap-client -m get -s 10 "coap://127.0.0.1/mqtt/topic1?c=client1&u=**&p=**"
1234
此时如果任何mqtt客户端或coap客户端向“topic1”发送消息,你都可以收到。
2 phpMQTT方式
发送:
<?php

require('./mqtt_string.php');

$server = 'localhost';     // change if necessary
$port = 1883;                     // change if necessary
$username = '**';                   // set your username
$password = '**';                   // set your password
$client_id = 'phpMQTT-publisher'; // make sure this is unique for connecting to sever - you could use uniqid()

$mqtt = new phpMQTT($server, $port, $client_id);

if ($mqtt->connect(true, NULL, $username, $password)) {
	$mqtt->publish('topic1', 'Hello World! at ' . date('r'), 0, false);
	$mqtt->close();
} else {
    echo "Time out!\n";
}
接收:
[apache@ai_bk ~]$ /home/libcoap/examples/coap-client -m get -s 10 "coap://127.0.0.1/mqtt/topic1?c=client1&u=pyrk&p=pyrk-0811"
Hello World! at Wed, 22 Jul 2020 17:38:40 +0800^C
3 mqtt客户端工具mqtt.fx